
Garbage Disposal Replacement for Kansas City Homes?
A garbage disposal that only hums, leaks beneath the sink, or trips the breaker can bring a working kitchen to a stop fast. This garbage disposal replacement guide helps Kansas City homeowners and property managers decide whether the unit can be repaired, what replacement to choose, and when to call a plumber before a small kitchen problem becomes cabinet damage or a drain backup.
Is It Time to Replace Your Garbage Disposal?
Not every disposal failure requires a new unit. A jammed impeller, a tripped reset button, or a loose electrical connection may be repairable. Start by turning the disposal off at the wall switch and breaker, then check whether the reset button on the bottom of the unit has popped out. If it has, press it once and test the unit after restoring power.
Never put a hand, tool, or fingers into a disposal chamber while power is connected. A disposal wrench can free many simple jams from below, but grinding noises, smoke, repeated breaker trips, or a unit that will not run after a reset are signs to stop troubleshooting.
Replacement is usually the smart call when the disposal is leaking from its body or bottom seam. That type of leak often means internal seals have failed, and seal repairs are rarely cost-effective. Replacement also makes sense if the motor is weak, the unit needs frequent resets, it has corroded connections, or it is more than eight to 12 years old. A disposal that drains slowly may have a clogged drain line instead, which requires a different repair.
Before You Buy: Choose the Right Replacement Unit
The best replacement is not always the most powerful model on the shelf. It needs to fit under your sink, connect correctly to your drain, and match how your kitchen is used.
For a smaller household or light-use rental, a 1/3- or 1/2-horsepower unit can be sufficient if residents are careful about what goes down the drain. For most family kitchens, 3/4 horsepower is a dependable middle ground with better grinding performance and less tendency to jam. A 1-horsepower model is often worthwhile for busy homes, larger households, and commercial-style kitchen use, but it costs more and may not fit every cabinet setup.
Check whether the new unit includes a dishwasher inlet. If your dishwasher drains through the disposal, the dishwasher knockout plug must be removed during installation. Forgetting this step can leave the dishwasher unable to drain and cause an immediate backup.
Also measure the available space. Taller disposal bodies can interfere with the P-trap, drain pipe, water filtration equipment, or pullout trash bins. A replacement may require drain-pipe adjustments even when it uses a common mounting system. That is one reason a seemingly simple disposal swap can turn into a plumbing service call.
Sound insulation is another practical consideration. Basic units can be loud enough to make conversation difficult, while insulated models reduce vibration and motor noise. For rental properties, durability and easy replacement parts often matter more than premium noise control. For a primary home, the quieter model may be worth the added cost.
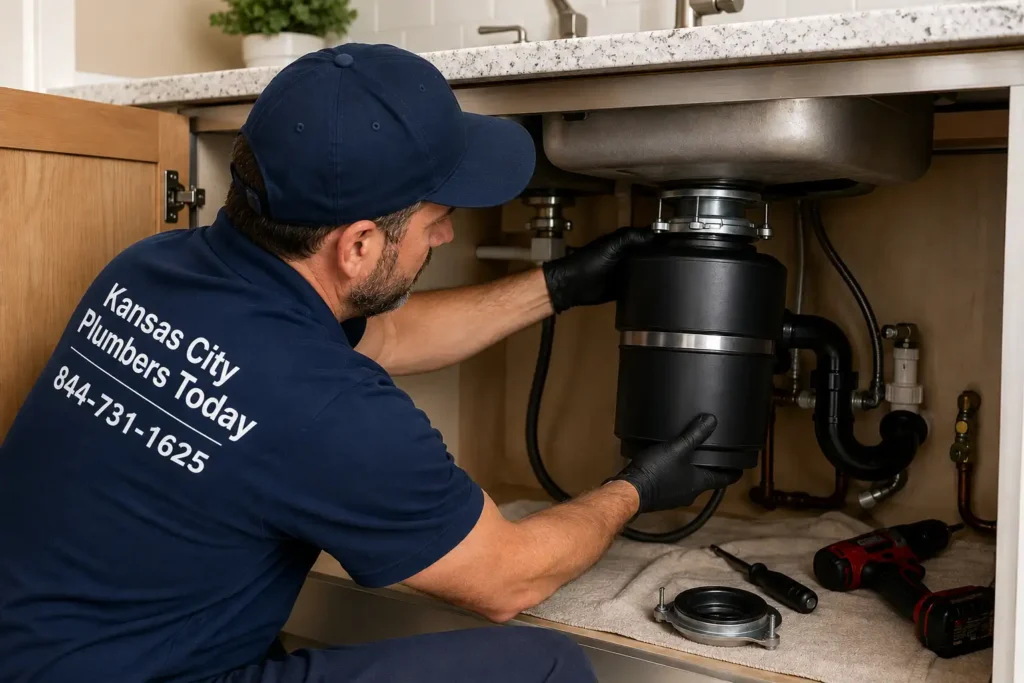
Garbage Disposal Replacement Guide: Safe Installation Steps
Replacing a disposal involves electricity, plumbing connections, and a heavy appliance under a confined sink cabinet. If you are experienced with basic home repairs, the work can be manageable. If you see damaged wiring, corroded pipes, a leaking shutoff valve, or an unusual drain configuration, call a professional instead of forcing the job.1. Shut Off Power and Prepare the Cabinet
Turn off the disposal circuit at the electrical panel, not just the switch above the counter. Verify that the disposal cannot turn on. Clear out the cabinet, place a towel and shallow pan beneath the unit, and take a photo of the existing wiring and drain arrangement before disconnecting anything. If the disposal is hardwired, its electrical connections must be disconnected safely from the junction box. If it plugs into an outlet beneath the sink, inspect the outlet and cord for heat damage, cracking, or moisture. An outlet that is loose, wet, or nonfunctional needs electrical attention before a new disposal is installed.2. Disconnect the Drain and Dishwasher Line
Loosen the slip nut at the disposal drain tube and lower the pipe carefully into the pan. Water and food residue will drain out. If a dishwasher hose is attached, remove its clamp and keep the hose elevated so remaining water does not spill into the cabinet. Inspect the drain tube and P-trap while they are accessible. Cracked plastic fittings, corroded metal parts, flattened washers, and missing cleanout access can cause leaks after the new disposal is installed. Reusing worn drain components can turn a successful replacement into a call-back problem.3. Remove the Old Unit Without Damaging the Sink Flange
Support the disposal from below before releasing the mounting ring. These units are heavier than they look, especially 3/4- and 1-horsepower models. Twist the mounting ring according to the manufacturer instructions and lower the unit slowly. If the new disposal uses a compatible mount, you may be able to keep the existing sink flange. Otherwise, remove the old flange, clean away old plumber’s putty, and install the new assembly. A properly sealed flange matters because water can leak slowly around the sink opening and ruin the cabinet base before anyone notices.4. Install, Connect, and Test for Leaks
Secure the new disposal on its mounting assembly, reconnect the electrical wiring or plug, then attach the drain tube and dishwasher hose. Use the correct gasket and tighten slip nuts firmly, but do not overtighten plastic fittings. Confirm that the dishwasher knockout plug has been removed if applicable. Run water into the sink before switching on the disposal. Check the sink flange, mounting connection, dishwasher hose, drain tube, P-trap, and cabinet floor for leaks. Then run cold water, turn on the disposal, and listen for unusual vibration or grinding. Cold water helps carry grease and food particles through the line instead of allowing grease to soften and coat the pipe.Problems a New Disposal Will Not Fix
A replacement disposal cannot correct every kitchen drain issue. If both sides of a double sink drain slowly, water backs up into the other basin, or the dishwasher fills with dirty water, the blockage may be farther down the branch drain. Replacing the disposal without clearing that clog can leave the kitchen unusable. The same is true if you smell sewer gas beneath the sink, see water around the cabinet after running another fixture, or have recurring backups. Those symptoms can point to a failed P-trap seal, damaged drain piping, improper venting, or a deeper sewer-line restriction. Restaurants and commercial kitchens may also have grease buildup that requires professional drain cleaning rather than a new appliance. In Kansas City homes with older plumbing, pipe condition matters. Aging galvanized lines, cast iron, and poorly repaired drain connections can be disturbed when a disposal is removed. A professional can identify whether the drain needs a simple adjustment, camera inspection, cleaning, or pipe repair before installing the replacement.When to Call for Same-Day Plumbing Help
Call for service if the disposal leak is actively soaking the cabinet, the circuit trips repeatedly, the unit is hardwired and wiring is damaged, or wastewater is backing up into the sink. Do not keep resetting a disposal that overheats or hums without turning. The motor can fail completely, and forcing it may damage the electrical circuit or worsen a jam. Professional installation is also the right choice when you need drain modifications, a new dishwasher connection, replacement shutoff valves, or help selecting a unit that fits a tight cabinet. Kansas City Plumbers Today can diagnose the disposal, drain, and connecting pipes in one visit, explain the repair or replacement options clearly, and complete the work without leaving you with a leaking sink.Keep the New Disposal Running Longer
A disposal is designed for small food scraps, not every leftover on a dinner plate. Keep grease, cooking oil, coffee grounds, pasta, rice, bones, stringy vegetables, fruit pits, and large amounts of potato peels out of the unit. These materials can form clogs, wrap around internal parts, or create a thick buildup farther down the drain. Run cold water before turning the disposal on, keep it running while food is processed, and continue the water flow for several seconds after the grinding stops. If the unit jams, shut off power first and use the proper wrench from below. Avoid chemical drain cleaners, which can damage seals and pipes while doing little to clear a mechanical jam. A new disposal should make kitchen cleanup easier, not create another emergency under the sink. If the fit, wiring, or drainage is uncertain, getting the installation checked now is far less expensive than repairing water damage later.About Us

Kansas City Plumbers Today offer fast, reliable home services for plumbing installation or repair, HVAC and professional electrical services.
With extensive experience in handling common and complex issues or emergency service, our team saves you time and money, ensuring your home services are conducted with the utmost professionalism and efficiency.
DISCLAIMER This site is designed to assist homeowners in connecting with local home service contractors. All home service contractors are independent and this site does not warrant or guarantee any work performed. It is the responsibility of the homeowner to verify that the hired home service contractor furnishes the necessary license and insurance required for the work being performed. All persons depicted in a photo or video may be actors or models and not contractors listed on this site.
